
Ready to Stop Searching for Hours?
How to Find Any Experiment in Seconds (Never Search Again)
It's 2 PM. You need to find that antibody dilution you tested three months ago.
With paper notebooks, this means: Which notebook was I using in October? Was it the blue one or the black one? October... that's probably pages 40-60. Start flipping. Check dates. Not this page. Not this one either. Wait, was it September? Check the other notebook. Keep flipping. Still looking. Finally find it. Twenty minutes gone.
With a digital lab notebook? Type "antibody dilution" in the search bar. Results appear in two seconds. Click. There it is. Done.
This is the feature that makes people fall in love with digital lab notebooks: search that actually works.
But search is only part of the story. The real power comes from knowing how to organize your experiments so that finding anything—a specific protocol, a failed experiment you want to reference, that one time you got weird results—takes seconds instead of minutes.
Let's talk about how to make that happen.
The Problem With Traditional Search
You might be thinking: "I can search in Word documents. I can search file names. What's different?"
Here's what's different:
Word/Excel search only works if:
- You remember which file to open
- You open the file first, then search within it
- The word you're searching for is in that specific file
- You spelled it the same way you're searching for it
If your protocol is in one Word file, your observations in another, your results in a third, and your gel image in a completely separate folder? You're searching multiple places. Opening multiple files. Hoping you remember where you saved what.
Digital lab notebook search works differently:
- Searches across ALL your experiments simultaneously
- Finds words in titles, content, tags, categories, everything
- Shows results instantly without opening each experiment
- Filters results by date, category, status, tags
- Ranks results by relevance
It's the difference between searching one room for your keys versus having a device that beeps when you're near them. Same goal, completely different experience.
How Search Actually Works in ELabELN
Let's get practical. Here's how to find anything you've ever documented.
Basic Search: Just Type
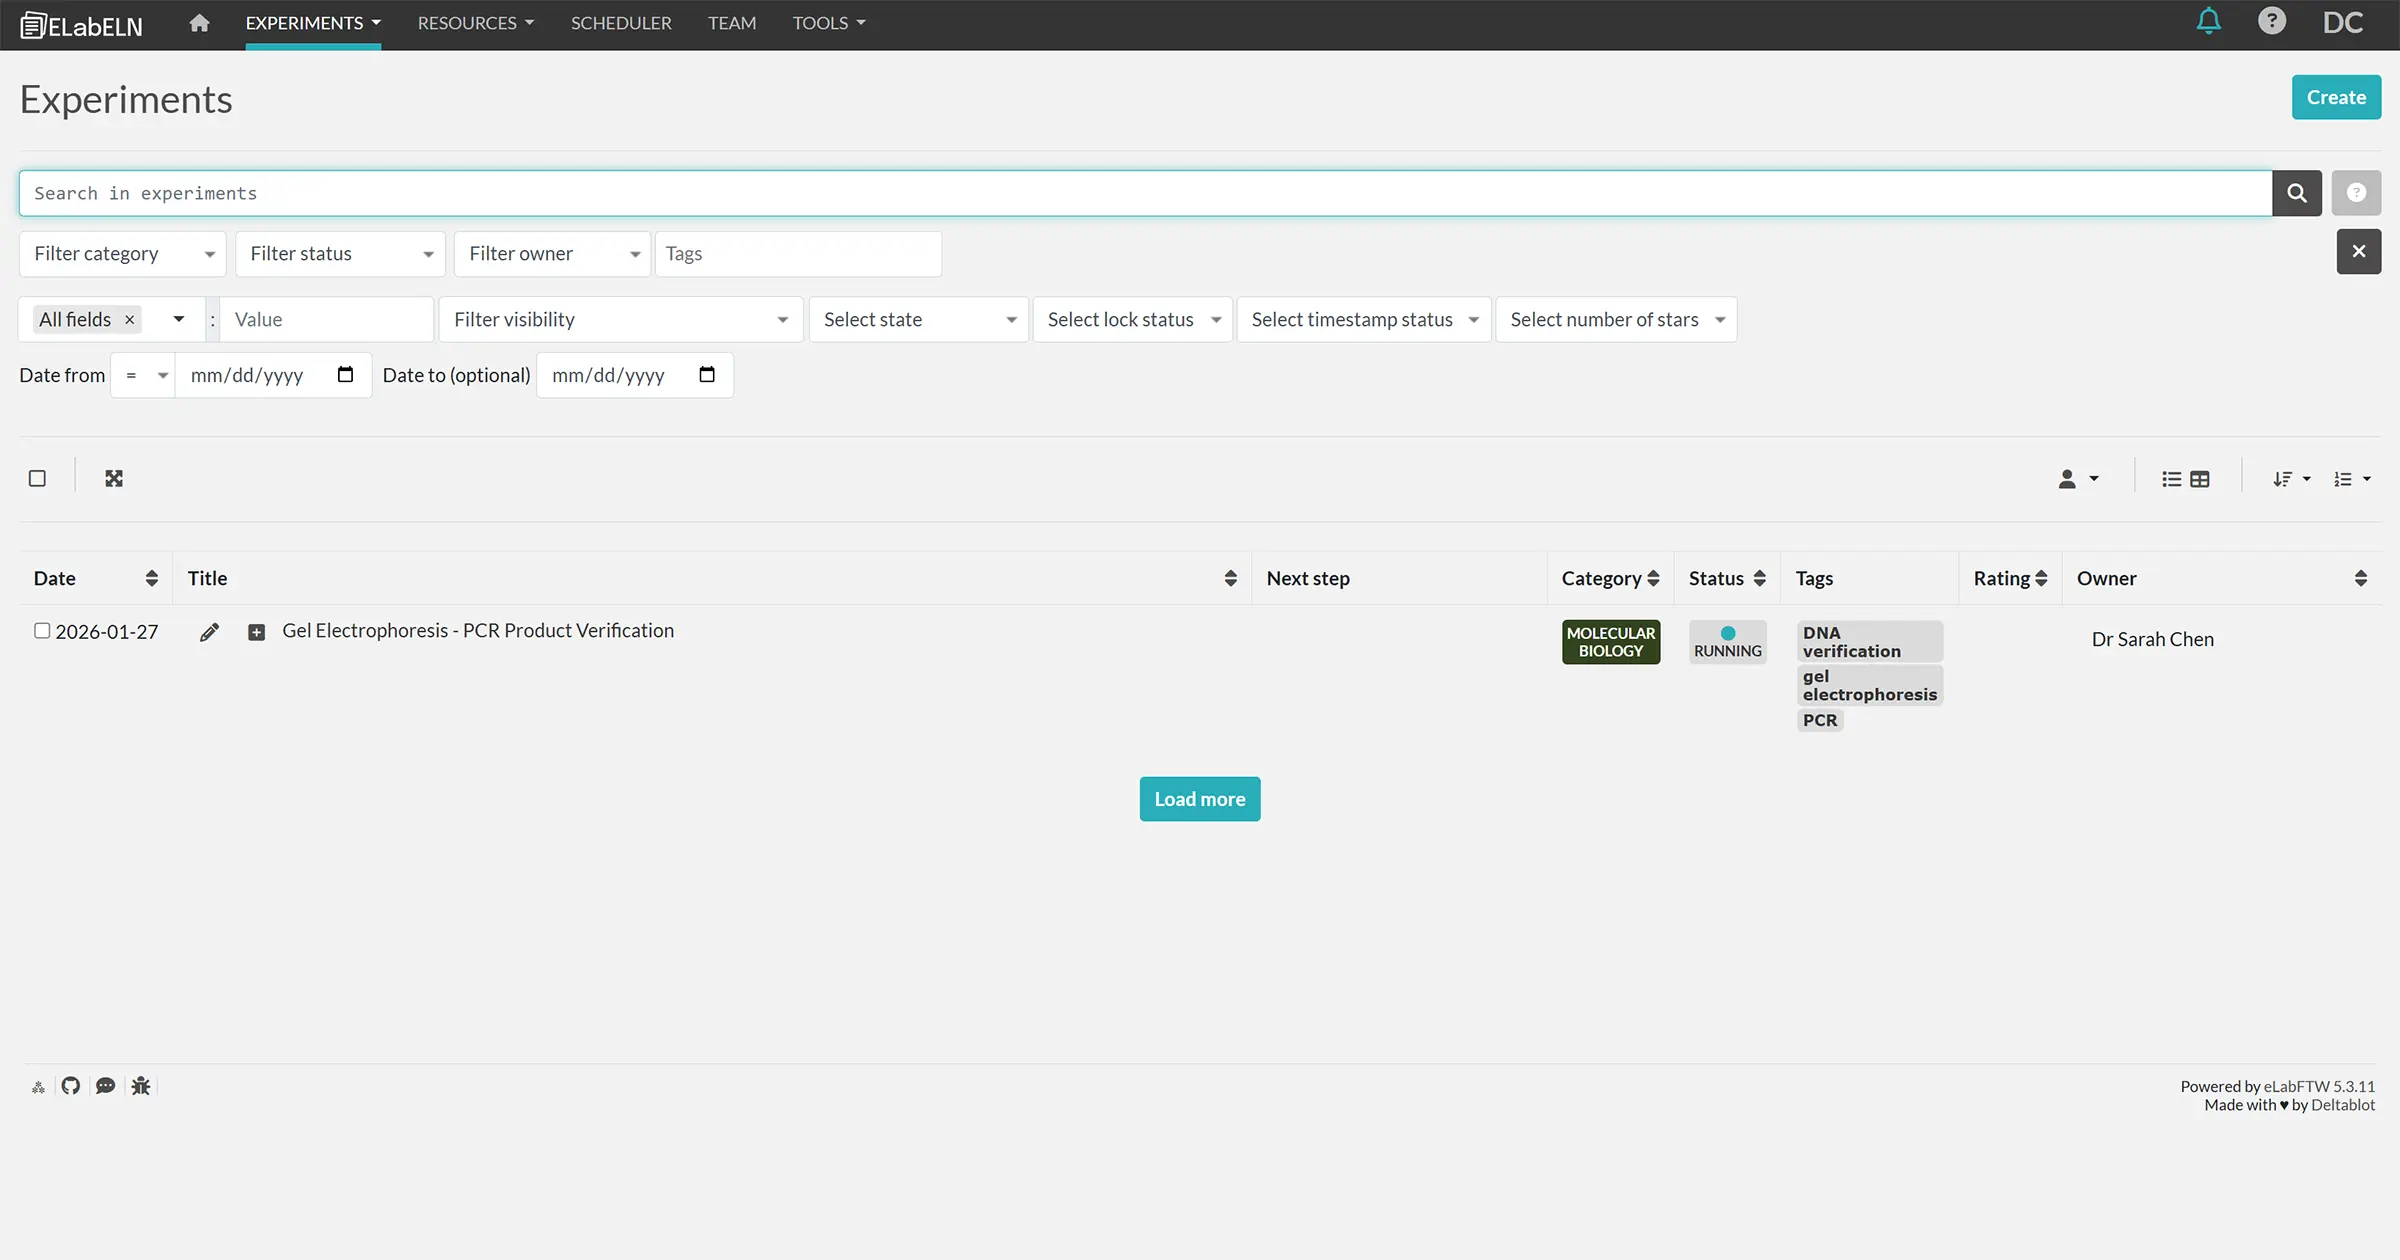
Go to Experiments → My Experiments. You'll see your list of experiments and a search function.
Type anything: a technique name, a reagent, a sample ID, a gene name, a date, anything that appears in your experiments.
ELabELN searches:
- Experiment titles
- All text content
- Tags
- Categories
- Linked experiments
- File names of attachments
Results appear as you type. Click one to open it.
Real Search Examples You'll Use
Here are searches people actually do:
"antibody dilution" → Finds all experiments where you tested antibody concentrations
"sample A5" → Finds every experiment involving that specific sample
"failed" → Shows experiments where you documented something going wrong (incredibly useful for troubleshooting)
"protocol v2" → Finds experiments using version 2 of your protocol
Filter by month → Use the date filters to quickly find all experiments from a specific time period
"contamination" → Quickly surfaces that time you had contamination issues and how you solved it
The key insight: search finds what you actually wrote, not what you filed it under. You don't need to remember your filing system. You just need to remember something you wrote.
Making Search Even Smarter: Tags
Tags are your secret weapon. They're keywords you add to experiments to make them easier to find later.
Think of tags as answers to the question: "What would I search for to find this?"
Good Tag Examples:
For a Western blot experiment:
- Western blot (technique)
- p53 (protein of interest)
- Drug X treatment (experimental condition)
- HCT116 (cell line)
- Batch 2024-03 (if tracking batches)
For a synthesis experiment:
- Synthesis
- Compound 47B (your internal ID)
- Column chromatography (purification method)
- NMR characterization
- Project Atlas (if part of larger project)
For a food formulation:
- Formulation
- Protein bar
- Shelf life testing
- Sensory evaluation
- Version 3.2
Tag Strategy That Actually Works:
1. Add tags as you create experiments (not retroactively—too much work)
2. Use consistent naming (always "Western blot" not sometimes "Western" sometimes "WB")
3. Include multiple perspectives:
- What technique? (PCR, HPLC, microscopy)
- What sample/subject? (Gene X, Sample 42, Drug treatment)
- What project? (Project name, grant number)
- What category of work? (Troubleshooting, optimization, routine)
4. Keep it simple (3-6 tags per experiment is plenty)
Pro tip: As you type tags, ELabELN will suggest tags you've used before. This keeps your tagging consistent without thinking about it. You can also consolidate and edit tags if needed.
Organizing With Categories
Categories are broader than tags. They're the "what type of work is this?" organizational layer.
Think of categories as your lab notebook sections, but flexible and searchable.
Example Category Systems:
For a molecular biology lab:
- Cloning & Plasmid Construction
- Protein Expression & Purification
- Cell Culture
- Functional Assays
- Imaging & Microscopy
For a chemistry lab:
- Synthesis
- Purification & Characterization
- Analytical Methods
- Scale-Up
- Method Development
For a food science lab:
- Product Formulation
- Sensory Testing
- Shelf-Life Studies
- Microbial Analysis
- Texture & Rheology
Create 5-10 categories that match how you think about your work. Don't overthink it. You can always change them later.
How to Use Categories for Quick Access:
Once you've categorized your experiments, you can:
- Click a category to see only those experiments
- Filter search results by category
- See at a glance what type of work an experiment is
Example: You need to find all your protein purification experiments. Click "Protein Purification" category. Done. All of them in one view.
Status: Track Where Things Stand
Status is different from categories. It answers: "What stage is this experiment in?"
Default statuses usually include:
- Running (currently in progress)
- Success (completed as expected)
- Need to be redone (didn't work, need to repeat)
- Fail (not completed as expected)
You can customize these. Some researchers use:
- In Progress
- Completed
- Failed
- Waiting for results
- Data analysis
Why Status Matters:
Quick filtering: "Show me all experiments that failed" → instant view for troubleshooting
Progress tracking: "How many experiments are in progress right now?" → know your workload
Team coordination: "What's waiting for results?" → see what needs follow-up
Publication prep: "Show me all completed experiments from Q3" → gather data for your paper
Combining Search, Tags, Categories, and Filters
The real magic happens when you combine these tools.
Real Scenarios:
Scenario 1: "I need all my PCR experiments from the last 3 months that worked"
- Search: "PCR"
- Filter by date: Last 3 months
- Filter by status: Success
- Results: Exactly what you need
Scenario 2: "Show me every time I tested Drug X on HCT116 cells"
- Search: "Drug X HCT116"
- Results: All experiments mentioning both
- Can further filter by date or category if needed
Scenario 3: "I need to review all my failed Western blots to figure out what's going wrong"
- Tag search: "Western blot"
- Filter by status: Failed or Need to redo
- Results: All unsuccessful Western blots in one view
- Now you can compare them and spot patterns
Scenario 4: "Find that experiment where I used the new antibody batch and got weird results"
- Search: "antibody weird" or "antibody unexpected"
- Results include any experiment where you wrote those words
- Your past self documented the issue; search found it
Advanced Search Techniques
Once you're comfortable with basic search, these techniques save even more time:
1. Search Within Results
Got 50 results for "antibody"? Too many. Type "dilution" to narrow those 50 results down to just experiments about antibody dilution.
2. Date Range Search
Most ELNs let you filter by date. Use this when you remember roughly when you did something: "It was sometime in March" → filter to March → much smaller list to browse.
3. Linked Experiments
If you link related experiments (we'll cover this more next week), you can find one experiment and instantly see all related work. Find the original PCR → see all downstream cloning experiments linked to it.
4. Saved Searches
Some searches you do repeatedly: "All my in-progress experiments" or "All troubleshooting from this project." Save these searches so you can access them with one click.
What Good Organization Looks Like
After 6 months of using a digital lab notebook, here's what you'll have:
- 100+ experiments, all searchable
- Consistent tagging system you use automatically
- 5-10 categories that make sense for your work
- Status markers showing what's done, what's in progress, what failed
- Ability to find any experiment in under 10 seconds
- No more "where did I write that?" moments
Compare that to 6 months of paper notebooks:
- 200+ pages of chronological entries
- Maybe sticky notes marking important pages
- Maybe a table of contents you don't update
- Finding anything requires page flipping and memory
- Still asking "where did I write that?"
Common Organization Mistakes (and How to Avoid Them)
Mistake 1: Over-tagging
Don't do this: Add 15 tags to every experiment
Do this instead: Add 3-6 meaningful tags. More tags don't make things easier to find; they just create clutter.
Mistake 2: Inconsistent naming
Don't do this: Sometimes "WB," sometimes "Western," sometimes "Western blot"
Do this instead: Pick one term and stick with it. Let autocomplete help you stay consistent.
Mistake 3: Too many categories
Don't do this: Create 25 hyper-specific categories
Do this instead: Start with 5-7 broad categories. You can always split them later if needed.
Mistake 4: Not using status at all
Don't do this: Leave everything as default status
Do this instead: Mark things as Completed, Failed, or In Progress. Future you will thank you.
Mistake 5: Trying to retroactively organize everything
Don't do this: Spend a weekend tagging 100 old experiments
Do this instead: Organize new experiments going forward. Tag old ones only if you happen to open them. Don't make this a project.
The Real Test: Can You Find These?
Here's how to know if your organization system is working. Try to find:
- The last time you used a specific reagent or sample
- All experiments from a particular project or grant
- That one time something went wrong and you documented the solution
- All experiments where you tested a particular condition
- Experiments from 6 months ago involving a specific technique
If you can find each of these in under 30 seconds, your system works. If it takes longer, adjust your tagging/categorizing strategy.
Start Simple, Evolve Over Time
Don't try to build the perfect organization system on day one. Start with:
- Basic categories that match how you think about your work
- Simple tagging - just 3-4 obvious tags per experiment
- Status tracking - mark things done or in progress
- Search when you need something - let search prove what works
Over time, you'll notice patterns:
- "I always search for sample IDs" → start tagging sample IDs consistently
- "I need to separate optimization from routine experiments" → add that category
- "I keep forgetting which experiments need follow-up" → use status more actively
Let your actual usage guide your organization system. Don't build it in theory.
The Moment It Clicks
There's a moment, usually about 2-3 months in, when someone asks you a question like:
"Hey, what concentration of that antibody did you use in March?"
And instead of saying "Let me get back to you," you type "antibody March" into your search bar, find the experiment in 5 seconds, and answer the question immediately.
That's when you realize: you're never going back to paper notebooks or scattered Word files.
Because this isn't just easier. It fundamentally changes how you work. Information isn't trapped in chronological order anymore. It's accessible. Searchable. Useful.
Your experiments become a knowledge base you can actually use, instead of a pile of documentation you can barely find.
Next week: We're going even deeper into collaboration features. How to share experiments with your PI, work together with lab mates, and coordinate across teams without email chaos.
Don't Miss the Next Guide
This is Part 4 of our 7-part series on making lab documentation easier. Each week, we publish a new guide and share it first with our newsletter subscribers.
Sign up for our newsletter to get the next article as soon as it drops, plus practical tips and insights you won't find on the blog.
Next week: "Lab Collaboration Without Email Chaos: Sharing, Permissions, and Teamwork"
Ready to Stop Searching for Hours?
ELabELN delivers instant search across all your experiments with saved searches, advanced filtering, custom fields, and enhanced collaboration features for even the most complex multi-project workflows. Get started today to schedule a demo and see how you can document your work once and find it in seconds forever.
"*" indicates required fields
© LabLynx, Inc. All Rights Reserved. LabLynx®, ELabELN™, and related marks are trademarks of LabLynx, Inc. This document may reference or interoperate with third-party technologies including Nextcloud®, ELabFTW®, and Node-RED®, whose respective copyrights, trademarks, and licenses remain the property of their owners. Nextcloud source code and license: https://github.com/nextcloud/server; ELabFTW source code and license: https://github.com/elabftw/elabftw; Node-RED source code and license: https://github.com/node-red/node-red. All third-party software is subject to its own licensing terms. Information provided herein is for informational purposes only and is not legal, technical, or professional advice. Product features and specifications are subject to change without notice.